 KiwiScience
Tika Tipu is experimental. It is a plant selector for students, researchers and curious minds. There is no guarantee that its outputs are entirely accurate — always sanity-check a species list against local knowledge, your regional council, and an eco-sourcing nursery before you buy plants.
Part 1 · User guide
Using Tika Tipu
Tika Tipu — the right plant in the right place — narrows a database of New Zealand native species down to the ones that suit your particular patch of ground. You answer up to four questions about the site, and the app returns the species that match all of them.
1 How the selector works
Every filter you set narrows the list. Every filter you skip widens it. The counter at the top of the app — n species match — updates live, so you can watch the effect of each choice as you make it.
All four filters are optional. Skipping one means “any”, not “none”. If you only know your region, set the region and jump straight to the results.
| Step | What it asks | Skip it if… |
|---|---|---|
| 1 · Region | Which ecological region your site sits in | You want the national list, or your site is a garden using cultivated stock |
| 2 · Soil | The soil order under your site | You have not looked the soil up yet |
| 3 · Moisture | How wet the ground usually is | Conditions vary a lot across the site |
| 4 · Plant use | The setting and the exact zone within it | You want a general regional list rather than one tuned to a niche |
| 5 · Results | — | — |
Move around freely. The numbered stepper at the top of the app is clickable — you can jump back to any step, change one answer and return to the results. The chips in the sticky bar show what is currently set, and the small × on each chip clears just that filter.
↻ Start over in the header clears everything at once.
2 Step 1 · Ecological region
Many native species in Aotearoa occur naturally only in certain parts of the country. Manawa, the New Zealand mangrove (Avicennia marina), grows only north of Kawhia and will not survive further south. Filtering by region is the single most effective way to avoid recommending a plant that has no business being on your site.
New Zealand is divided into 78 ecological regions, which group ecological districts sharing broadly similar geology, climate, landforms and biota. In the app you can either click your region on the map or pick it from the dropdown list.
- Not sure which region you are in? Zoom the map to your site — the region boundaries are drawn over the basemap and the name appears when you click.
- Working across a boundary? Run the search twice, once for each region, and plant only the species that appear in both lists.
- Eco-sourcing: region is also your guide to provenance. Seed collected from your own ecological region is better adapted to local conditions and keeps regional genetic character intact.
Read more: DOC guide to ecological regions and districts (PDF) · Wikipedia overview
3 Step 2 · Soil order
Most plants are adapted to particular soil environments. The New Zealand Soil Classification sorts our soils into 15 orders on the basis of how they formed and how they behave; Tika Tipu uses 13 of them. Look your site up on the Landcare Research soil map before you choose.
| Soil order | What it is like |
|---|---|
| Pallic | Pale soils; wet in winter, dry in summer. Dry eastern hill and downlands. |
| Brown | New Zealand’s most widespread soils; well drained, moderately fertile. |
| Podzol | Acidic and strongly leached, under high rainfall and old forest. |
| Oxidic | Old, deeply weathered volcanic clays — Auckland and Northland. |
| Granular | Clayey soils formed on old volcanic ash. |
| Ultic | Strongly weathered with a dense, clay-rich subsoil; prone to erosion. |
| Raw | Very young and barely developed: screes, active dunes, tidal flats. |
| Recent | Young soils on floodplains, slopes and fresh alluvium; often fertile. |
| Melanic | Dark, well-structured and fertile; limestone and basalt country. |
| Allophanic | Free-draining volcanic ash soils — Taranaki, Waikato, Bay of Plenty. |
| Pumice | Coarse, free-draining pumice of the central North Island. |
| Organic | Peaty soils of wetlands and bogs, formed from partly decayed plants. |
| Gley | Waterlogged soils with grey, oxygen-poor subsoils. |
Soil order and moisture are not the same question. A Gley soil is wet by definition, but a Brown soil might be wet in a hollow and dry on a ridge. Set the moisture step from what you can see on the ground, not from the soil name.
Read more: NZ Soil Classification — the soil orders
4 Step 3 · Soil moisture
Soil moisture describes the usual moisture content of the ground at your planting spot, for most of the year — not the state it happens to be in on the day you visit.
| Setting | What it means | Typical places |
|---|---|---|
| Wet | Waterlogged or frequently saturated | Swamp and bog margins, seepages, pond edges, backswamps |
| Mesic | Moderate and well drained — neither soggy nor droughty | Most flat to rolling country, gentle slopes, sheltered gullies |
| Dry | Free-draining or drought-prone | Ridges, north-facing slopes, sand, gravel, shallow soils over rock |
Sites are rarely uniform. A stream bank runs from wet at the water’s edge to dry on the terrace above in a few metres. Run a separate search for each moisture band and plant each band with its own list — that is exactly the thinking behind the zoned diagrams in Step 4.
5 Step 4 · Plant use and zones
This is the step that makes Tika Tipu more than a regional species list. Choose the setting you are planting — a road verge, a raingarden, a dune, a wetland — and the app draws that setting as a labelled cross-section. Then click the exact zone in the drawing where your plants are going.
Each zone carries its own palette of species. The crest of a dune, its seaward front slope and the damp slack behind it are three completely different growing environments only metres apart, and the app treats them that way.
- Pick a setting from the card grid. Each card shows a thumbnail of its cross-section.
- Click a zone in the drawing. Hover first — a label names each zone before you commit.
- Only one zone at a time can be active. Clicking the selected zone again clears it.
- Check the chips below the drawing. Some zones cannot be drawn in cross-section (a pergola, a rock garden, a swale’s dry bed) and are offered as chips instead. They work the same way.
- Use the back button above the drawing to return to the settings grid and try another.
The drawings live in the app, not in this guide. They are interactive there — hover to read a zone name, click to select it. Open Step 4 in Tika Tipu to work through them.
The twelve settings
| Setting | What it covers | Examples of its zones |
|---|---|---|
| Urban | Gardens, lawns, hedges, green roofs and walls | Living wall, green roof, herbaceous border, permeable paving, specimen tree, hedge |
| Swales & Raingardens | Stormwater treatment and detention ponds | Road edge, wet bed, raingarden bed, wet and dry detention ponds, aquatic |
| Railway Ballast | Trackside and ballast planting | Inner and outer ballast, outermost shrubbery, trackside back bush |
| Road Verge | Verges and traffic islands | Water table, sight line, frangible edge, mown mid, back fence, cut and fill |
| Rural | Shelterbelts and farm planting | 1–2 row shelterbelt, 3–5 row edge and centre, hedge, under pivot arm |
| Riparian | Stream and river corridors | Terrace top, upper and lower scarp, levee, backswamp floodplain, emergent, aquatic bed |
| Dune Country | Coastal dune systems | Beach front, foredune toe, crest, slack, sand plain, stable backdunes |
| Coastal | Estuaries, marshes and cliffs | Mudflats, lower and upper marsh, lagoon reeds, exposed cliffs, coastal bush |
| Wetlands | Freshwater wetland types | Swamp, fen, grazing marsh, bog |
| Restoration | Bush and hillslope restoration | Skin, border and core rows, epiphytes, crest, mid and toe slopes, slips, seepages |
| Mātauranga Māori | Traditional uses and cultural plants | Rākau/muka, kai, rongoā, taonga |
| Remediation | Contaminated or degraded sites | Treated wastewater, mine spoil, quarry, compacted landfill |
Remediation settings are the most experimental part of the tool. Treat those lists as a starting point for further reading rather than a planting plan, and get specialist advice for contaminated ground.
6 Step 5 · Reading your results
The results page lists every species that passes all of your filters, grouped by planting stage. The line under the heading restates the filters that produced the list, so a printed copy explains itself.
- Simple / Detailed switches the level of information. Simple gives names only; Detailed adds growth form, planting stage and ecosystem services for each species.
- Species names link out to the New Zealand Plant Conservation Network for photographs, descriptions and distribution.
- Copy list puts the names on your clipboard, ready to paste into an email to a nursery.
- Print produces a clean copy with the app furniture stripped out.
No results? You have probably over-filtered. Clear the most restrictive chip first — usually the plant-use zone, then the soil order. A combination such as a Pumice soil in a Southland wetland may genuinely have no matches because it barely exists.
7 Planting stages
Results are grouped by planting stage — the order in which species go into the ground on a restoration, not how big they get. Working through the stages is what turns a list of plants into a sequence of plantings, often over several years.
| Stage | What goes in | When |
|---|---|---|
| 1 · Pioneers & colonisers | Hardy, quick species that bind the soil and shelter everything that follows | First planting |
| 2 · Canopy & early successional | The framework trees and shrubs | Once the pioneers give some shelter |
| 3 · Understorey & enrichment | Shade-tolerant plants tucked under an establishing canopy | Once a canopy is forming |
| 4 · Epiphytes & mistletoes | Perching and parasitic plants | Last, once host trees are grown |
On a bare, exposed site, plant Stage 1 heavily and hold the rest back. Putting a Stage 3 understorey plant into open pasture usually wastes the plant. Stage 1 species also make the best hardy edge species described in Part 2, section 4.
8 Ecosystem services
Switch the results to Detailed and each species carries tags for the ecosystem services it provides. Wildlife and pollination services are listed first, because they are usually what people are planting for.
| Group | Services recorded |
|---|---|
| Wildlife & pollination | Nectar and pollen for lizards; nectar for insects; seed and grain for birds; fruit for birds; fruit for lizards |
| Land & water | Erosion control; filtration; coastal protection |
| Shelter & amenity | Shelter; shade |
| People & materials | Cultural; timber; fibre; food |
Growth form is tagged too — forb, tussock, sedge, reed, shrub, small, medium and noble tree, fern, epiphytic fern, mistletoe, vine, scrambler, cushion, turf and aquatic turf — which is the quickest way to check that a list has structural variety rather than twenty shrubs.
9 Tips and troubleshooting
| If… | Try this |
|---|---|
| The map does not load | Check your internet connection — the basemap is fetched online. The dropdown list works offline. |
| You get far too many species | Add the plant-use zone. It is the sharpest filter in the tool. |
| You get none | Clear filters one at a time, starting with the plant-use zone. |
| Your site spans two regions or several moisture bands | Run one search per combination and plant each part of the site from its own list. |
| A species looks wrong for your area | Trust local knowledge. The database is broad-brush and the tool is experimental. |
| You want to keep a list | Use Copy list or Print — results are not saved between visits. |
Before you order plants, check availability with an eco-sourcing nursery in your region. Nurseries need lead time — often a full season — to grow to order, so talk to them early.
10 About the database
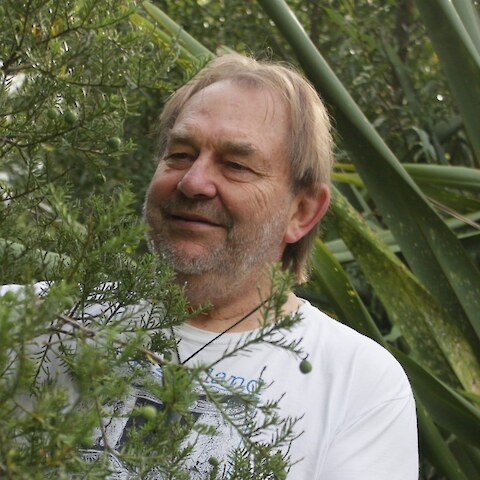
Dr Colin Meurk ONZM · plant ecologist
The species data behind Tika Tipu was compiled by Dr Colin Meurk, a New Zealand plant ecologist whose work on indigenous biodiversity in production and urban landscapes has shaped how native planting is done here. His research spans subantarctic and alpine vegetation, urban ecology and ecological restoration, and he has spent decades arguing that native plants belong in the everyday landscape — on farms, roadsides, city streets and back gardens — not only in reserves.
The database records, for thousands of native species, which ecological regions they occur in, which soils and moisture regimes they tolerate, which planting niches suit them, what stage of a restoration they belong to, and what ecosystem services they provide. Tika Tipu is a way of querying that knowledge; the knowledge itself is his.
Accuracy. The database is broad in scope, which means it is necessarily coarse in places. It records what a species can tolerate, which is not always what will thrive on your site. Use it to shortlist, then check with local sources.
Part 2 · Field guide
Planting native plants the right way
A practical guide to getting native seedlings into the ground so they survive — from fencing and pest control, through setting out and digging, to guards, weeds and follow-up.
What this part covers: how to place, plant and protect seedlings. It does not cover which species to choose — that is what Part 1 and the Tika Tipu selector are for.
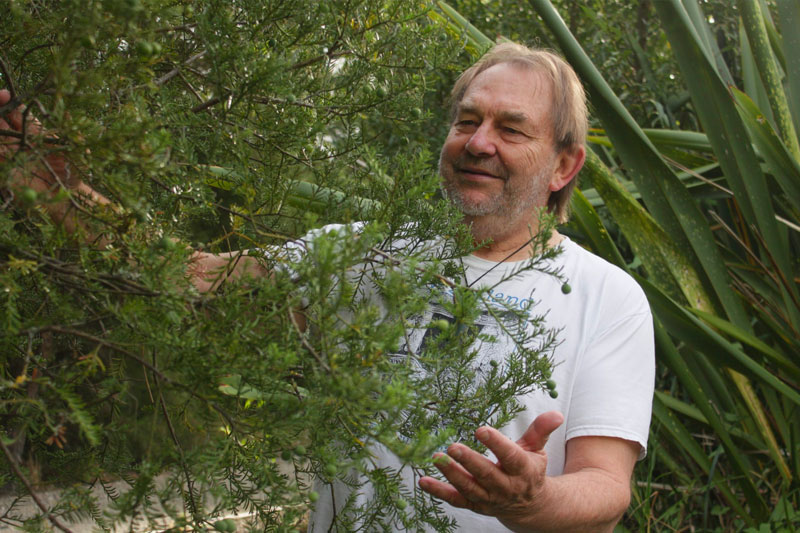
Good technique is the difference between a plant that thrives and one that sulks, blows over or dies. None of it is hard. Work through the steps below in order, and give each seedling the same care you would give the first one.
1 Fence out stock first
Cattle, sheep, goats, deer and horses will graze, trample and snap almost every native you plant, including tough species like manuka, kanuka and totara. Fresh nursery plants are especially tempting because of the nutrients they carry. So the single most important thing you can do before planting is put up a stock-proof fence. A good fence lasts for decades and lets natural regeneration take off as well.
Choosing a fence
- Deer netting, 1.8–2.0 m: excludes sheep, cattle, horses, goats and deer. The safest all-round choice next to farmland.
- Eight-wire post and batten: a strong barrier for sheep and cattle. Add an electric outrigger where horses, cattle or bulls lean on it.
- Two or three wire electric: holds cattle, but only while it is kept live at all times.
- Rabbit and hare mesh: fine mesh (aperture 50 mm or less) fixed to the fence. Extend it out along the ground about 400 mm on the pest side to stop digging, and up the face to 1.1 m to stop hares.
Set plants back and shelter the edge. Keep the first row beyond the reach of any animal leaning over the fence. On open sites, plant your hardiest, fastest colonising species along the windward edge. They shelter the plants growing behind them and cope better with the odd nibble from the fence line.
Fit a gate so you can remove any stock that breaks in quickly.
Funding. Many regional councils and the QEII National Trust help with the cost of new fencing around retired riparian margins and bush. Ask before you start.
2 Knock back pests before you plant
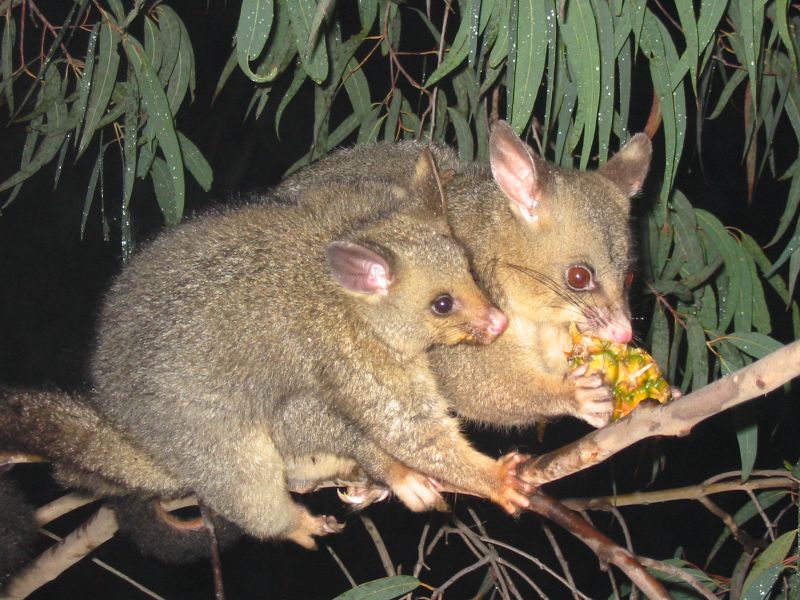
Fences stop farm stock, but rabbits, hares and possums can still get in and do real damage to fresh seedlings. Run a control programme immediately before planting, when it counts most, then keep watching.
How to read the damage
| Culprit | Sign on your plants | Best control |
|---|---|---|
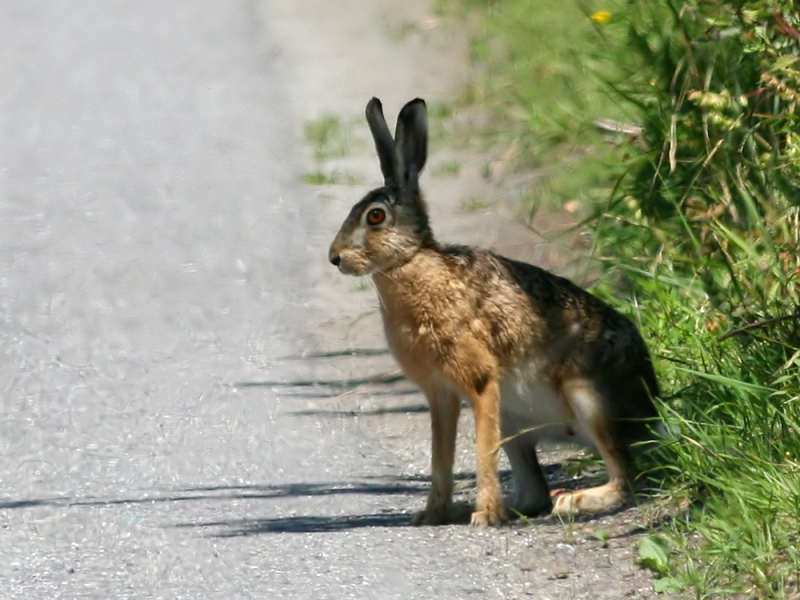
| Hare | Clean 45° cut of the main stem; top discarded nearby | Shooting (rarely takes bait) |
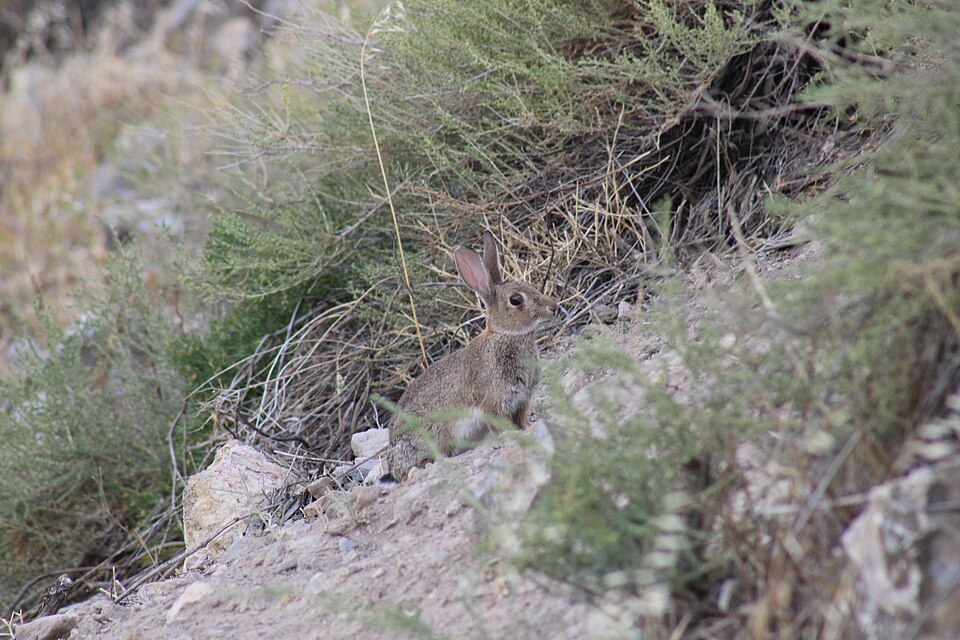
| Rabbit | Browsed leaves and stems; diggings; round droppings | Shooting or Pindone bait; fine mesh fence |
| Possum | Chewed new growth and flowers; damage to older saplings on edges | Trapping, shooting or bait |
| Deer | Browsed tops; antler rubbing and ring-barking on saplings | Deer netting; hunting |
| Goat / pig | Seedlings eaten to stubs (goats); rooted up and uplifted (pigs) | Fencing; hunting |
| Pukeko / weka | Fresh seedlings pulled out, often not eaten | Larger grades, firm planting; deterrents |
Get expert advice on baits and traps to stay safe and get results. Monitor after planting and act fast on new damage. Keep follow-up control going until seedlings top one metre.
3 Clear weeds before you plant
Grass and weeds compete with young natives for light, water and nutrients. Effort spent controlling them before planting pays off many times over in less work later.
Grass and pasture sites
- Hard graze or mow within three months of planting to knock the sward down near ground level. This makes access, spraying and planting far easier.
- Spray if the grass is vigorous. Tough species like kikuyu usually need herbicide. Spray clean, green, actively growing foliage in early autumn or spring.
- Spot spray a patch for each plant when spacing is wider than 1.5 m. Blanket spray when planting denser than 1.5 m.
- Where grass is thin and weak, you may not need herbicide at all. Just plant soon after hard grazing.
Going herbicide-free? It can work, but a sprayed pasture sometimes fills with worse weeds such as thistles, vines or gorse. Weigh that against the alternative of hand releasing plants from rank grass.
Woody weed sites (gorse, broom, blackberry, privet)
Dense woody weeds are the hardest sites. Poor preparation leads to vigorous regrowth that smothers your natives. Combine mechanical clearing with herbicide, and allow up to two years to get aggressive species under control before you plant. Planting a dense nurse crop of fast growing shrubs can then close a canopy within 2–3 years and hold the weeds down.
4 Where each plant goes
Placement is two decisions at once: matching each plant to the conditions it likes (its ecology), and arranging plants so they help you win the battle against weeds.
Match the plant to the spot
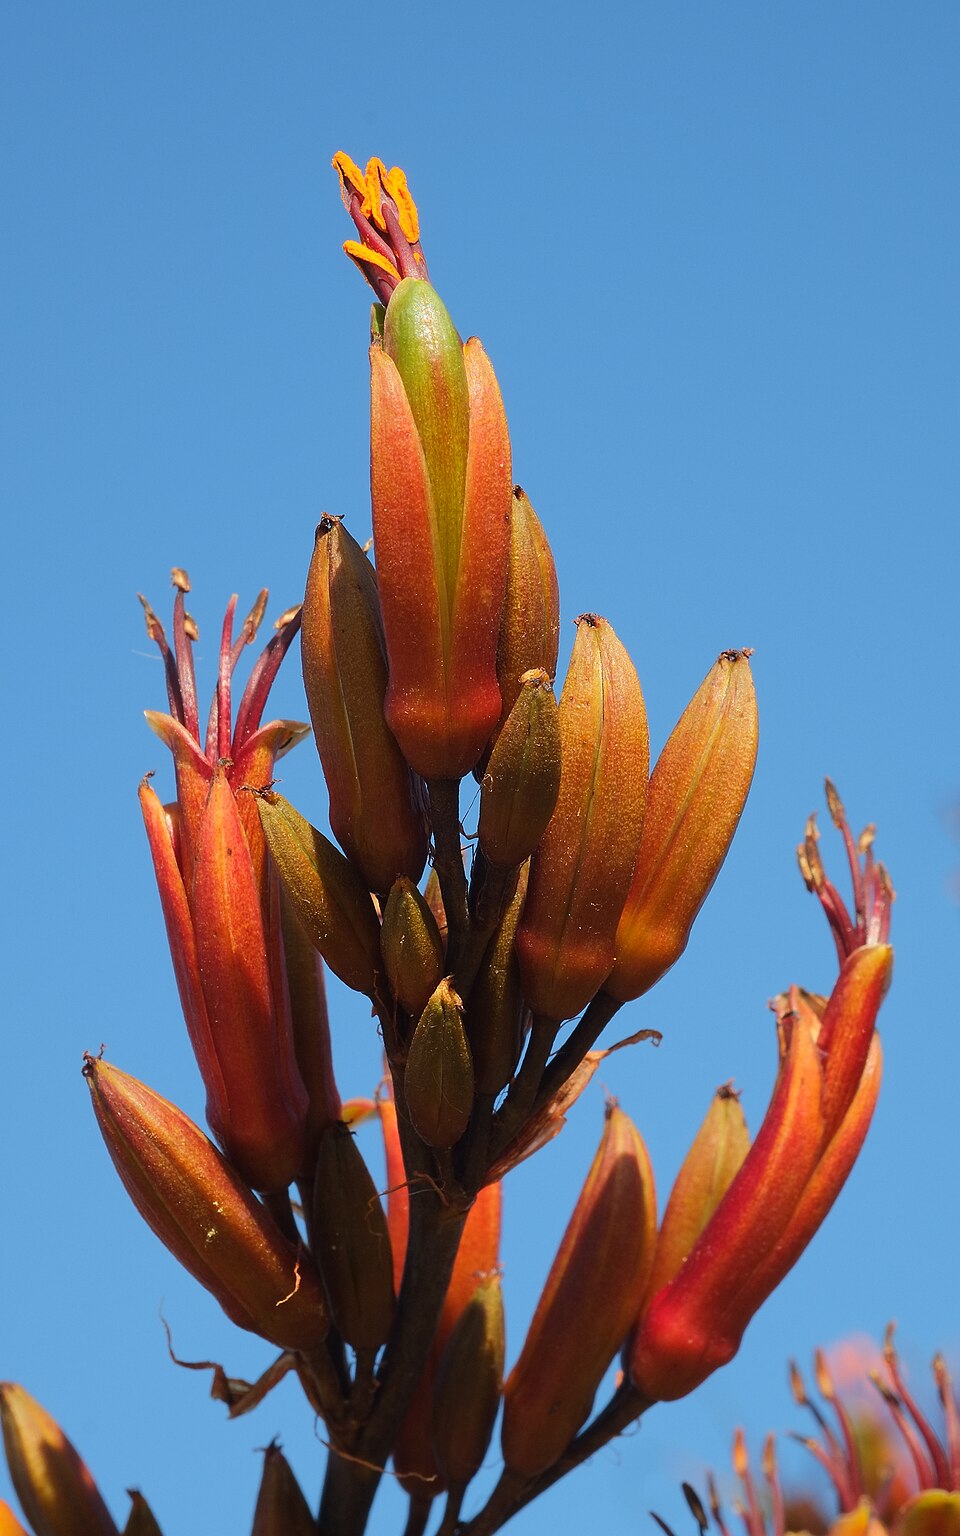
Put moisture-loving plants in the low, damp ground near water, and drought-tolerant, wind-hardy plants on dry ridges and exposed edges. Match shade-lovers to sheltered or shaded positions and sun-lovers to the open. A plant in the wrong spot struggles no matter how well you plant it.
Use spacing to beat weeds
Spacing is your best long-term weed tool. Plant densely and the canopy closes sooner, shading out weeds and cutting years off your maintenance.
Dense planting at 1.2–1.5 m typically closes a canopy in 2–3 years and suppresses weeds, so you only spray or hand-release for a few seasons. Wider spacing means cheaper plants up front but more years of weed control. Choose the trade-off that suits your budget and labour.
5 Setting out the holes
Lay plants out across the site before you start planting, at your chosen spacing. Offset each row so plants sit in the gaps of the row beside them. This triangular pattern gives the most even cover and the fastest canopy.
| Planting aim | Rough spacing | What to expect |
|---|---|---|
| Dense revegetation (fast canopy, least weeding) | 1.2–1.5 m | Canopy closes in 2–3 years; blanket spray |
| Shrubs and smaller trees | 1.5–2 m | Longer weed control; spot spray |
| Larger trees | 2.5–3 m | Slowest canopy; most years of weeding |
Mark your plants. Push a 60–90 cm bamboo stake next to each seedling, on the same side every time (say the north side, within 15 cm). You will find every plant again quickly when you come back to weed or check it, even in long grass.
6 Digging the hole
Aim for a hole about twice the width and depth of the root ball. Loosen the sides and bottom and pull out large stones. Cultivating the spot improves drainage and lets roots push out quickly, which matters most on heavy clay or compacted ground.
- If dense grass covers the spot, skim it off with the spade first (screefing). Do not strip away too much topsoil.
- Drive the spade in with your boot and make several deep parallel cuts, tilting to loosen, then cross-cut. You want a well broken, crumbly planting spot.
- Using an auger on wet clay? Score any smooth, glazed sides with a spade. A glazed wall seals the hole and roots cannot get through it.
Auger sizes: a 150 mm bit suits large PB3 planter bags; 100 mm suits smaller grades. A motorised borer gives consistent hole depth, which is handy for community planting days.
7 Out of the pot or tray
Take the plant out of its container at the planting spot, and keep as much soil around the roots as you can. A healthy root system binds the mix into a solid mass that holds together when the pot comes off.
- With root trainers and trays, ease plants apart gently. Roots often tangle with the neighbour beside them.
- Do not leave bare root balls sitting out. Exposed roots dry out fast, especially in sun or wind. Plant them promptly.
- Collect the plastic pots, bags and trays as you go and send them for recycling.
If the root ball falls apart when you remove the pot, the plant was not ready. Note it, plant it carefully, and raise it with your nursery next time.
8 Disturb the roots, or not?
The short answer: leave a good root ball alone, and only intervene when the plant is pot-bound. How much a plant tolerates root disturbance also varies from species to species, so err on the side of gentleness.
- Good root ball: plant it as it is. Needless root disturbance only sets the plant back.
- Pot-bound plant: loosen the ball and tease out the fibrous roots, or cut and trim badly twisted ones, so roots grow into the surrounding soil rather than strangling in a circle.
- Species sensitivity: some natives resent root disturbance more than others. When unsure, handle the roots as little as the job allows.
The real fix for pot-bound stock is to reject it at the nursery. Remedial root work in the field is a patch-up, not a cure, and is impractical at scale.
9 Filling the hole for survival
How you set the plant and firm the soil decides whether it lives through its first dry spell and its first gale.
- Moisten first. If the root ball is dry, soak it in a bucket until the bubbles stop, then let it drain. A dry ball is hard to re-wet in the ground.
- Set the depth. Place the root collar (where stem meets roots) at least 5 cm below the surrounding soil. Plant deeper on dry, drought-prone sites so roots reach moist soil. In wet regions, do not plant deep or dish the surface, as ponding can rot the stem.
- Backfill and firm. Push soil back around the roots with spade and boot, and firm it down to remove air pockets. Keep a gentle upward pull on the seedling while you firm so the roots are not bent or folded.
- Check it holds. A shallow or loosely firmed plant will spin in the wind (planters call it twizzling) and fail. It should sit firm when you tug the top lightly.
Do you need extras? On most sites, no. Fertiliser is usually unnecessary and fast-release nitrogen just feeds weeds; use only slow-release granules in the hole on very poor soils. Water crystals (hydrogels) show unclear benefit. Watering is generally not needed if you use well grown plants and plant deep. A degradable mulch (bark, wool mat, straw) helps hold moisture and suppress weeds at small scale.
10 Plant guards: yes or no?
A plant guard (such as a combi-guard) is a sleeve on stakes around the seedling. On the right site it earns its place. On the wrong one it is a cost and a plastic problem. Decide deliberately.
The case for guards
Guards can lift survival and speed early growth. They shelter seedlings on exposed sites, reduce rabbit and hare browsing, and shield young plants from herbicide drift while you release-spray around them. Combi-guards bundle these benefits together. Some come with a coir mat at the base to hold weeds down. All of them need bamboo stakes to stay upright, and checking after wind.
The case against
- Cost and labour: roughly $1–2 each, plus the time to stake and maintain them. That rarely stacks up at large scale.
- Heat stress: plastic guards can cook seedlings inside during hot summers.
- They must come off: a guard left behind becomes litter and a hazard to the plant it protected.
Plastic guards and microplastics. Corflute and other polypropylene guards persist in the environment for years. Sunlight, soil and weather break them down only slowly, and as they fragment they shed microplastics into soil and waterways, where they enter the food chain. Calling a plastic "degradable" does not fix this: it still leaves microplastic behind. Reuse plastic guards while they last, then remove them and recycle them. Do not leave them on site.
Biodegradable options (wool, cardboard, hessian or jute) break down in place without leaving microplastics, which suits riparian and restoration sites. Wool-based guards commonly last a year or more before softening. Know their quirks: cardboard can attract paper wasps, and heavy jute can collapse onto small seedlings as it rots.
Rule of thumb: use guards on small, high-value, or exposed and browse-prone plantings. On large sites, rely on good fencing, pest control and dense planting instead, and if you do use guards, choose biodegradable and commit to removing any plastic.
11 Weed control after planting
Keep weeds off your plants until the canopy closes, usually the first 3–5 years. You have two tools: the spray gun and your hands.
Release spraying
- When: mid-spring, once plants are established and showing new growth and the grass is getting competitive.
- How: apply a grass-and-weed herbicide in a 500 mm arc around the base. Cover the competing growth but keep it off the plant.
- Bonus: the dying weeds break down and act as mulch.
Hand weeding and releasing
- Within 2–3 months of planting, hand-release plants smothered by grass. It is labour-intensive but precise, and needs no chemical.
- A common combination is spraying mature weeds, then hand-pulling the seedlings that follow.
Herbicide near natives. Careful spraying of glyphosate around most natives rarely harms them, but tolerance data is limited and species differ, so keep spray off foliage and stems. A guard or a physical shield helps. Follow the label and keep herbicide out of waterways.
Note: herbicide use is a sensitive topic. Check current regional council rules and label directions before spraying, especially near water.
12 Pests after planting
Planting does not end pest pressure. Rabbits, hares and possums keep testing your plants until they are big enough to shrug off a browse.
- Keep watching. Walk the site regularly and act fast on fresh damage. Bamboo markers make plants easy to find.
- Control until plants top one metre. That is roughly when they outgrow the worst of the browsing risk.
- Plant big, plant firm. Larger grades (PB3, PB5) that are well firmed resist being pulled out by rabbits, pukeko and weka.
- Repellents applied at planting can help, but reapply after heavy rain.
- Less palatable, hardened-off stock takes browsing better. Retaining some tall grass around plants can also deter rabbits, though it competes for water, so balance the two.
13 Planting day checklist
- Fenced to exclude stock, with mesh at the base if rabbits or hares are about.
- Pests knocked back in the weeks before planting.
- Weeds cleared by grazing, mowing or spraying; woody sites prepared well ahead.
- Plants laid out at your spacing, offset row to row, hardy species on the windward edge.
- Holes about twice the root-ball width and depth, sides loosened, no glazing.
- Root balls moist before planting; pots collected for recycling.
- Roots left intact if healthy, teased or trimmed only if pot-bound.
- Root collar 5 cm deep (deeper on dry sites; no dish in wet regions).
- Firmed so plants do not spin in the wind.
- Guards only where justified, staked, biodegradable preferred, plastic to be removed.
- Marked with bamboo stakes for easy release and monitoring.
- Follow-up plan for weeds (3–5 years) and pests (until plants pass 1 m).
• Sources and credits
This guide summarises current New Zealand restoration practice. For your own site, follow specific local advice and product labels.
Key references
- Tāne’s Tree Trust: How to plant native seedlings
- Tāne’s Tree Trust: Site preparation for planting natives
- Restore Native: How to release spray a tree
- Department of Conservation: Planning and planting a native garden
- NZ Plant Conservation Network: Revegetation
- Earth to Earth: Biodegradable vs plastic plant guards
- Arborgreen: Tree guards and microplastic pollution
Photographs
Photographs are hosted on Wikimedia Commons and remain under their respective licences. Open each image’s source page for the author and licence terms. Diagrams are original to this guide and free to reuse.
Prepared as a practical field reference for volunteers and landowners. Information is provided in good faith; assess it against your own site conditions and seek technical advice where needed.